My review of three potato gardening methods

Best Way to Grow Potatoes

I have finally completed the experiment. The potato tires were the last to be harvested and I am ready to give a review of the various methods I used. I did not do a lot of the container methods as I am terrible at remembering to water and we live in an arid region. I did not think they’d survive my climate and neglect in a container.

Raised bed and Straw

The first method I used was simply placing the potatoes on top of the soil of a raised bed and covering them with straw. Super simple. Good yields. Easy to harvest as well since they did not go very deep in the soil. My only issue with this was that the poultry liked to dig them up.

Tire potato tower planting

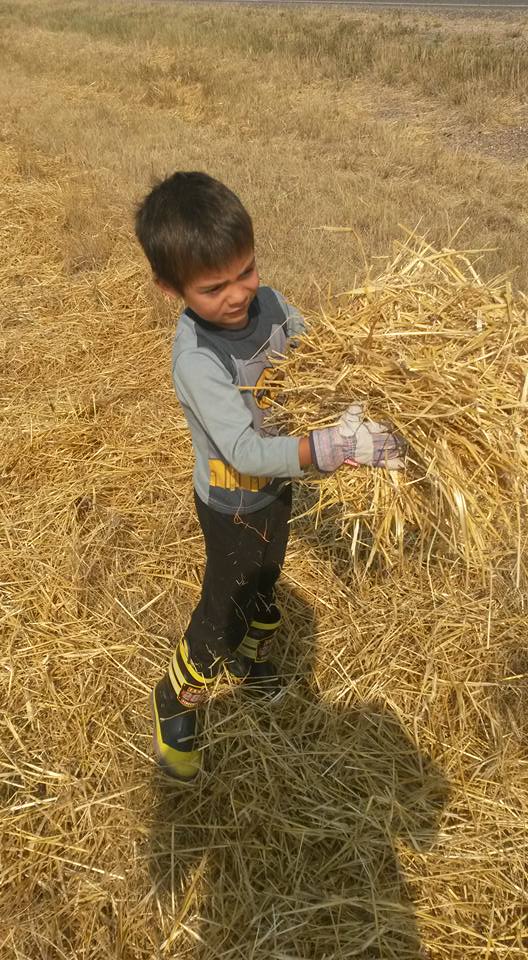
Potato tower being planted.

The second method was a potato tower made of tires. I only had it 2 tires high and perhaps I waited too long to put the second tire on. There were no potatoes in the second tire. Yields were less with this method than with the straw method. Also, it was dangerous. While I know the spiders were doing me a great service by eating pests I had quite a fright when I flipped the first tire and found a black widow living between the 2 tires. I found quite a few in my harvest. I won’t do this method again. It’s too labor intensive, yields were not great and it’s a risk to my health.

IMG_2854

IMG_2856

The third was perhaps the laziest method of them all since I never watered them, ever. I simply buried the seed potatoes in the berms. They did grow. They even produced a few seeds. However, I believe most of them to have been eaten by ground animals. That’s ok by me. Rather they eat the potatoes than my tree roots.

First tomatoes and peppers- delicious salsa

There is so much beauty in a harvest. The colors, the smells, the flavors. My kitchen is a cacophony of natures amazing bounty. Peppers, tomatoes and herbs right now. I’m loving my harvest this year. The tomatoes, oh the tomatoes. So beautiful and so plentiful. The peppers have amazed me with their size, quantity and flavor. This is a partial tomato harvest and a full pepper harvest. I asked Daughter to pick the red peppers and she just went to town grabbing them all so…..I let her. I picked only the ripe tomatoes for this.  So many tomatoes!

IMG_2675

I can’t even name the varieties of tomatoes I have grown this year. Many were given to me unlabeled. The seeds I grew are San Marzano and Black Krim.

The kitchen is making me SOOO happy right now. The sink has been a godsend in prepping produce for canning. I don’t think I could have done much of this in the old kitchen. I certainly couldn’t fill up the necessary pot. I’ve had colanders full of produce being washed in the sink by my little angels who seem as excited by this process as I am.

I did look up salsa recipes and I did base my salsa off of a particular recipe, however, I didn’t follow the recipe practically at all. I’ve simply never canned my own salsa before and I was looking for a guide for doing it.

IMG_2674

So, here are my peppers and onions getting washed Delicious!

IMG_2687

The tomatoes receiving the same treatment.

So I removed the skin using the hot water method. I did it incorrectly though. Some of the tomatoes were perfect, as below. Some were left too long and were mushy. Those tomatoes I hand chopped, the nice ones were run through the food processor.

IMG_2695

IMG_2694

Chopping over cooked tomatoes here.

IMG_2699

Salsa! It’s a bit watery but I’m ok with that. Cilantro was an easy grow for me so I had a plethora of that.

IMG_2700

Hot water bath canning. I did not have the correct tools yet. My mother had a bunch of canning stuff and I did retrieve it from her later. The gloves worked great for this though. You can find them Here. Husband bought the gloves for our pig roast (see here) but they have been hanging out with my pot holders and I enjoy them quite a bit in the kitchen.

IMG_2701

IMG_2702

As for taste, perfect. Not too hot, very flavorful. I’m very happy with how this worked out.


This post contains an affiliate link.

Adjusting Driveway Water Catchment

IMG_2722

If you’ve been following our progress you are probably aware of our driveway problems. Our driveway turns into a flooded, muddy, impassable mess every time a drop of water hits it. We get so much standing water on our driveway the ducks move out and swim on it.

Last year we used the tractor blade to make a ditch on one side of the driveway and dug drainage ponds in 2 spots on our driveway. One very large one to catch garage water and one after our treeline to drain the driveway. Neither of these were large enough to do what they needed to do this spring. Of course, it was an unusually wet spring. Still, we need to prep for more water!

IMG_2739

Thankfully we have our new, beautiful excavator to put to work. Husband (and the stray kid) has been busy ditching on both sides of the driveway and deepening the tree line drainage pond. That pond is quite deep now and I was quite happy as I really really needed to plant the bamboo I’d bought during the winter. I really didn’t want to bring it into the house for another winter and it had been hanging out in a pot on the porch all year. So I used the excavator to dig a largish hole, filled it with biochar and compost and planted the bamboo. Then I took a seed mix (dry land pasture grass, alfalfa, sainfoin, nitro-radish and winter barley) and spread it out in the new ditches and around the bamboo and “pond”. I’m hoping this helps stabilize it from erosion. The bamboo should also help with erosion.

IMG_2735

The kids have been loving this deep hole and I can’t seem to stop them from grabbing their shovels and heading out to adventure in it. A close eye will have to be kept on the little stinkers come rainfall.

IMG_2723

IMG_2717
My lovely car is such a farm truck!

If we need to expand this pond we will expand it northward. The trenches are quite deep and I’m excited to see how they work. All dirt from the trenches was put onto the driveway.


So, we shall see.

Straw as mulch in the garden

Straw hair  Straw help

straw truck  Straw happy

This years garden has been a pretty good success. Some failures but mostly awesome success. So I want to expand. I want more, always more. Our soil is a problem and so are weeds. The soil I imported for this years garden was infested with lambs quarter. That has been a real challenge. I have used straw in the raised bed with good success so I wanted to do it all with straw this fall and plant into it this spring a la Ruth Stout.

The problem for me is finding straw. The straw I bought for my straw bale garden may have possibly been sprayed with something, leading to it’s failure. I didn’t want hay because of the seeds, of course. I thought I wanted wheat straw. As an organic wheat selling mega house state I knew I could find that. In fact it’s stacked up in front of our house some years. Wouldn’t it figure that the only seller I could find was in Colorado then. What a trial.

We decided we’d drive down and grab a bunch of straw for our driveway (that will be another post) and my expanded garden areas. I wasn’t looking forward to the drive. It’d be about an hour round trip which isn’t too bad if you don’t have to take 2 toddlers with you. So, about a mile from our house has been sitting an estimated 8 large round bales of straw. They have exploded everywhere and been abandoned for a little over 2 weeks. They obviously fell off of someones truck and they decided it wasn’t worth it to pick them up. Luckily, it’s worth it to me. I grabbed the kids this Saturday, put all our rubber boots and work gloves on (yes my children have adorable tiny work gloves) and a tarp and set off in our SUV.

I did 6 loads on Saturday (2 without the kids) and 3 loads today. I have accumulated a nice stack of straw in one of my garden areas. TONS more to pick up still. It’s almost free (I’m counting gas as a cost) and it’s AMAZING. It’s chock full of bugs at this point which thrills my birds. It amuses the kids to grab a few loads and I couldn’t be more pleased with someone else’s misfortune. Now to finish grabbing what I need and spread it around evenly.

IMG_2538 IMG_2543 IMG_2549 IMG_2560 IMG_2563

Removing Canadian Thistle the fun way

The Fun Way to Remove Canadian Thistle

I’ve been slack with several parts of the property lately and you can tell. The flowers beside the house have been completely taken over by canadian thistle. Oh my. A thorny, pain filled mess of a fast spreading nightmare. What was a girl to do?

IMG_2331

The thistle had set seed and the seed heads were beginning to open. So the obvious solution, to me, was to collect the seed heads and burn them. That’s what I did!

IMG_2310 IMG_2318 IMG_2322

So we started burning the seed heads on our S’mores making plate. The wind was a a bit too severe to keep flaming pieces of plant material there though, so we moved them to a bucket and had some fun!

IMG_2327 IMG_2328

While we didn’t use the seeds for a s’mores roast I thought I’d include pics of how we make s’mores in Wyoming Winds. Yum!

IMG_2270 IMG_2273 IMG_2275

Cider Orchard Establishment

IMG_2188

I am happy to announce that our cider orchard is almost done. Ok, let’s just say it’s officially started. We took a portion of the backyard and fenced it off. We tilled and planted clover and wildflowers as mentioned in this post. The clover and such are filling in nicely, so are the weeds.

IMG_2190IMG_2189

We have a lovely cattle panel arch leading into the cider orchard. I have a kiwi planted near it but that kiwi has been hit and miss for some time so I don’t know that it will recover. If it doesn’t I’ll eventually move some grape cuttings into the area.

IMG_2192 IMG_2198

We have the swales running in a circle around the orchard. They have proven that they can collect water already, though it was more of an aesthetic and ease of watering thing for me.

IMG_2191

The trees are newly grafted heirloom varieties. It took us quite some time to get the infrastructure of the orchard up and thus the trees were in tree pots for some time. These tree pots. They didn’t do all that well in them. It was really hot but I did water them daily. Even still it is my guess that they cooked in the pots. The ones on the outside of did poorly. Some died but the rootstock of some lived. I’m going to let it grow and re-graft later on.

Dead
Dead
Rootstock is alive, graft is dead.

Not all the plants in the cider orchard are cider apples. I have hidden rose apples planted in there because I want to have them close to the house for my personal enjoyment. I also have a black currant bush in there that can be used as a mix in for cider or just for personal enjoyment. Eventually I’ll have a few specialty plums thrown in as well.

black currant
black currant

IMG_2197

The wild flowers and vetch seeds were thrown onto the berm of the swale and into the back of the cider orchard where it is too shady to grow trees and also already has established willow trees.

IMG_2194 IMG_2195 IMG_2196

Where the barn is it is very shady a lot of the time. Thus I am planting a shade garden. I have some hostas, a golden bell flower and a few other things thrown in. The wildflower seeds are doing best in this area.

IMG_2199 IMG_2200 IMG_2202 IMG_2203 IMG_2204 IMG_2205 IMG_2206 IMG_2209 IMG_2210 IMG_2211

Eventually I hope to have a lovely table and chairs and picnic amidst the flowers and trees. I think it will be a lovely retreat for us!