Gardening in Winter- Indoors

Indoor Propagation and Seed Starting

Behold my propagation/seed starting winter garden. I have a lot going on. We only have 2 windows that get enough sunlight to grow plants. This is but 1 of them. What I have here is 2 Russian Pomegranates (black pots), lots of mint, Niagara grape cuttings being rooted, mulberry cuttings being rooted, Pineberry seeds that are hopefully growing, cold hardy kiwi that I most likely killed, tomato, Russian Almond (can’t see) and onion bulbs I was hoping to have go to seed before spring.

Now, allow me to break this process down.

Ebay, oh Ebay. I bought a ton of stuff off of Ebay. Most of them came in excellent shape as well.

20141222_141050This is a mulberry I purchased off of Ebay. I bought 3 different kinds of Mulberry. I potted this one up and stuck it in the window. It now looks like this:

OLYMPUS DIGITAL CAMERA OLYMPUS DIGITAL CAMERAIt has taken off!

So have the Russian Almond bushes I have waiting in their cereal box planters

OLYMPUS DIGITAL CAMERA OLYMPUS DIGITAL CAMERA

The grape cuttings are beginning to leaf out as well:

OLYMPUS DIGITAL CAMERA

As are some of the unrooted Mulberry cuttings I’d purchased:

OLYMPUS DIGITAL CAMERA OLYMPUS DIGITAL CAMERA

As you can see I have them in a sort of mini greenhouse. It is working just fine!

I haven’t taken any other pictures of my pomegranates. They have not done anything noteworthy since I got them.

I bought all of these things in mass, at once. So naturally they all arrived in the mail at the same time. This meant I had a busy evening ahead of me. Thankfully I have some very happy helpers.

20141222_184909 20141222_184654 20141222_184850 20141222_184835 20141222_184825 20141222_184703

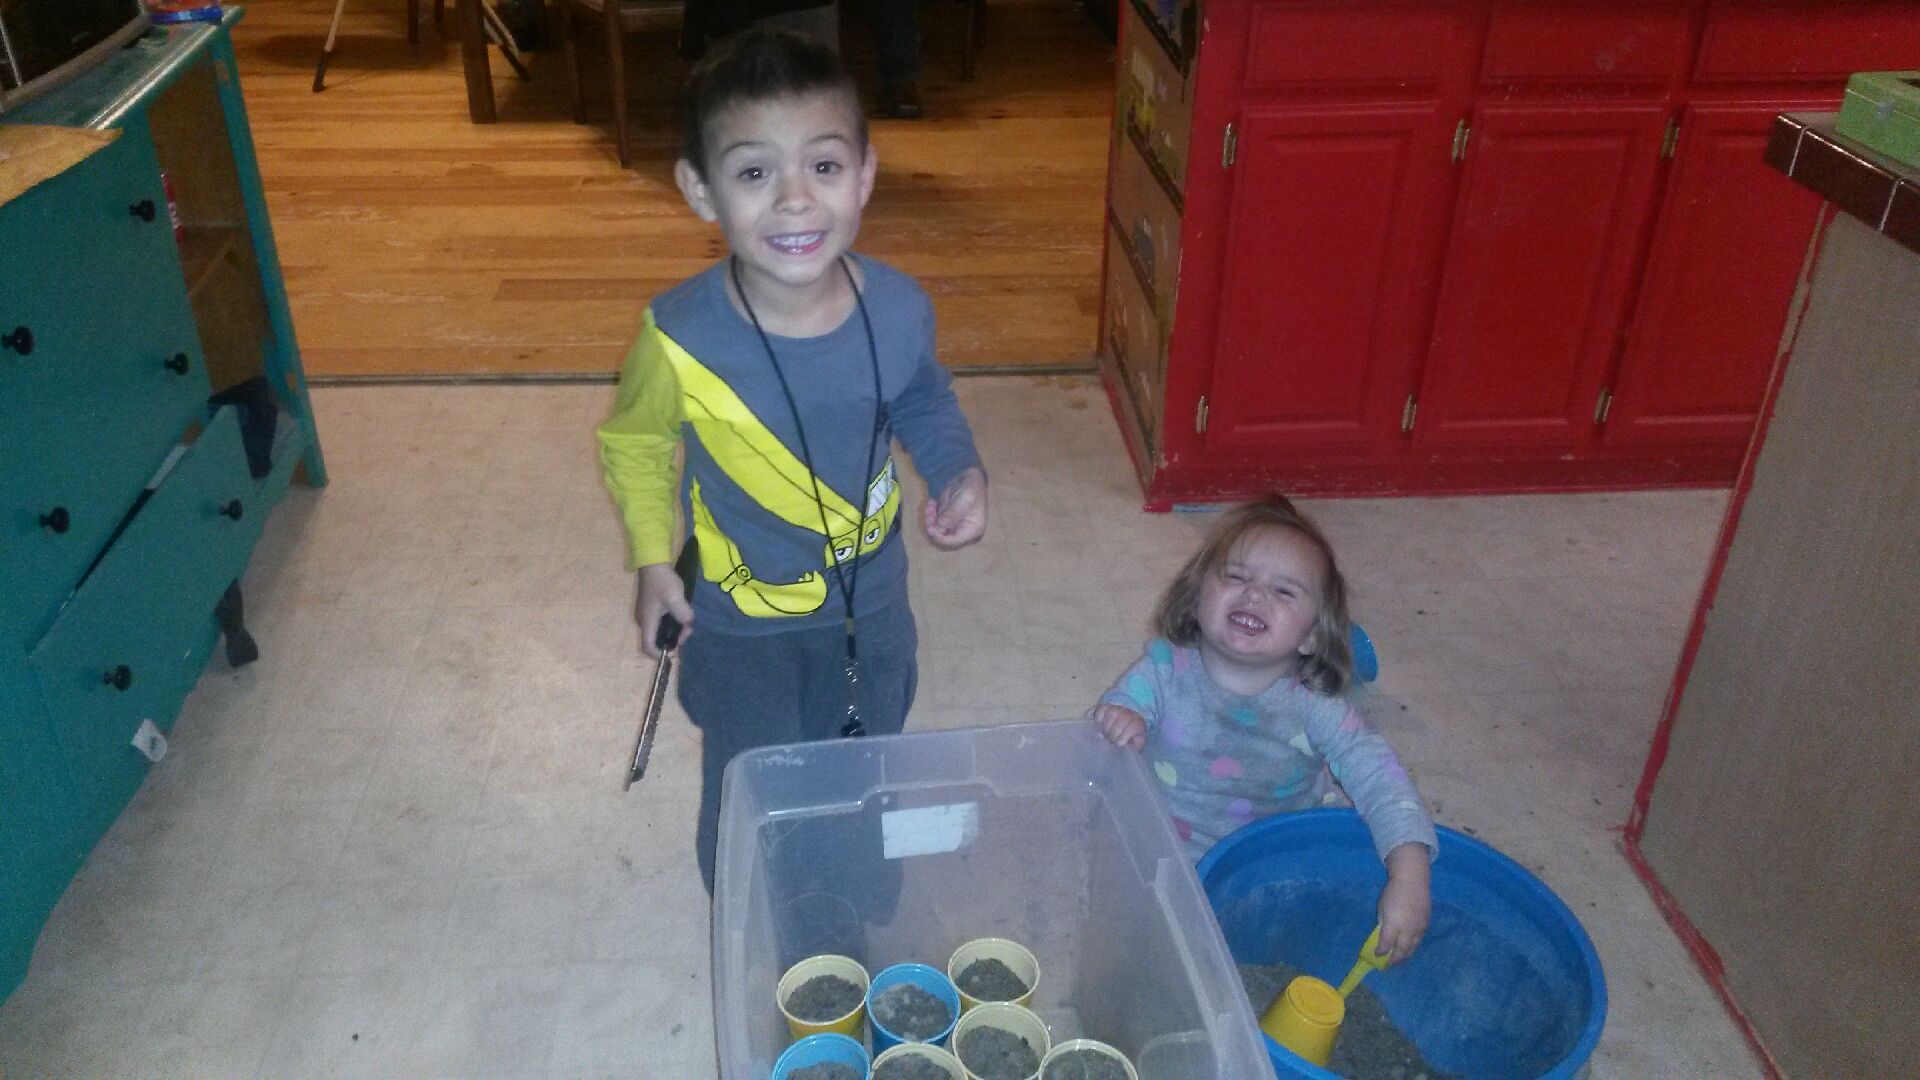
Daughter is busily throwing dirt about, and occasionally getting it into a cup, while son is scarifying the hazelnut seeds for me.

20141222_184818 20141222_184843

Here they are. Pre-scarifying and then planted in their mini greenhouse, ready to go outside for stratification. They are outdoors now, placed in a new mini greenhouse as I broke the last one. I didn’t see any change in them. I’m hoping at least a few of them germinate. Who knows. I have a few grape seeds in there as well. I realize grape is said to be terrible to get from seed but I’m trying anyway as seen here:

20141222_184901

I also bought some bamboo. It arrived very well packaged. And is doing quite well situated in our other available window. The great pyr tolerates many things, odd plants stuck in his food dish are just part of the package.

OLYMPUS DIGITAL CAMERA OLYMPUS DIGITAL CAMERA OLYMPUS DIGITAL CAMERA OLYMPUS DIGITAL CAMERA

Here are a few pics of the mint I’m propagating. We have a lot of bare land so I have no problem sporadically planting mint about and seeing what happens.

OLYMPUS DIGITAL CAMERA OLYMPUS DIGITAL CAMERA OLYMPUS DIGITAL CAMERA OLYMPUS DIGITAL CAMERA OLYMPUS DIGITAL CAMERA

Now for some of my odder projects. I get throw away produce from a local grocery store for my poultry. Whenever I’m sorting through and find something good I always try to see if I can save it. These carrots are part of that. They are organic carrots and I’m hoping to allow them to go to seed. They are doing marvelously. I started them in wet paper towels and when I saw enough roots I planted them into cups. I think I’ll just leave them in the cups now. I did the same with some onions. The onions are less pleased with my treatment though. I don’t know that I’ll get anything from them.

OLYMPUS DIGITAL CAMERA OLYMPUS DIGITAL CAMERA OLYMPUS DIGITAL CAMERA OLYMPUS DIGITAL CAMERA OLYMPUS DIGITAL CAMERA OLYMPUS DIGITAL CAMERA

Some thyme that was also a grocery store save.

OLYMPUS DIGITAL CAMERA

I also made my own rooting hormone from willow this year.

Make your own rooting hormone

I will share my secret. I cut up willow, put it in a used Starbucks drink jar with water and then forgot it. Voila!

OLYMPUS DIGITAL CAMERA

Quick look at my tomato seedlings. Just milk jugs with toilet paper rolls. They are doing well so far!

Stay tuned for my tree seed post and my outdoor winter gardening post. This just got too long to include anything else.

Krater Garden? Oh yes!

gallatinmidway
photo from Zach Weiss of elemental ecosystems

Krater Garden finished construction

housekraterafter5
photo from Zach Weiss of elemental ecosystems

Same krater garden planted and growing.


So what is a krater garden?

Sepp Holzer, The “Rebel Farmer” from Austria, developed the krater garden after a trip to Siberia. The crater garden is, well….a crater, with terraced sides. Water collects in the bottom of the crater and feeds the plants grown on the terraces. Krater gardens also create micro-climates in which plants that cannot normally be grown in a particular zone may thrive.


Why would I want to make a krater garden?

Well, why not? My land is pretty flat and pretty dead. I’m in a High, dry and windy area. I need to take advantage of wind protection and water harvesting opportunities. I also like the idea of increasing the square footage of my 40 acre property.


The plans:

Initially I was going to go big, really big. However, big earth works come with big price tags, also, permits. So after speaking with the local water permit person I was granted permission to do a small krater garden without requiring a permit. I had the honor of being the first person in Wyoming to mention krater gardens and I had to send a lot of krater garden information to explain what I was talking about.

http://www.elementalecosystems.com/phone/krater-gardens.html

http://www.permies.com/t/37563/sepp-holzer/Crater-Gardens

So the plan is to use the bucket of our small tractor to dig a krater garden that is no more than 3 feet deep and 14′ in diameter. Of course, that is the water harvesting portion of it. I didn’t hear them say I couldn’t do the terraces larger so I’m going with as big as I can with my limited earth moving equipment. You might be wondering how we came upon 3′ and 14′ in size. Well, the simple answer is that I’d dug a duck pond with the tractor before and from that experience knew that 3′ was as good as I was getting. The duck pond is also 14′ in diameter so it seemed like a good idea to get that approved since I’d dug it before I was quite aware of water law and regulation.

It is winter here right now but that is just fine as the planning stage is in full force. I need to pick the location for this garden and plan the plantings. I’ve been making the front of the house the experimental area, so now I need to pick which part will be cratered. If the crater garden does well I may expand the concept to the rest of the property. I am right now imagining 40 acres pock marked with 3′ deep craters.

I will most assuredly keep everyone updated with my krater garden progress.


Thanks again to Zach Weiss for granting me permission to use his photographs. Be sure to check him out!  (http://www.elementalecosystems.com/crater-gardens.html)

Experimenting with various garden techniques- triumphs and failures

2014 was a year of experimentation and learning for me. I moved the kitchen garden to a new location and used a variety of materials to make raised beds. I also tried many of the gardening techniques I’d found on Pinterest. Here is a list of what I tried and what worked:

PALLETS:

Verdict: Failure for onions. Might be a triumph with lettuce.

20140617_193309

20140717_182141

PALLET GARDEN

I grew onions in pallets this year and it was only mildly successful. I had ants move into one, which was partly good and partly horrible. They were army ants and I liked having them there as I saw them eat quite a few grubs. I did not like having them there because they swarmed whenever I watered or weeded. Unpleasant. I do think the idea of pallets is a good one, perhaps my technique was just off. I had to put more dirt in halfway through the season as it settled quite a lot. Keeping the dirt moist was also a problem. I mulched the rows with straw, but the pallets were thin and thus the dirt layer was as well. It just dried out pretty quickly. The onions I pulled in the fall would be considered pearls. I decided to save them for replanting this spring.

So would I do this again, maybe, but not for onions. I think this would work well with lettuce but that is about it.

RAISED BED:

Verdit: Triumph

20140617_193348

Squash planted around watering hole

 20140617_193324

Asparagus (above and below)

 20140617_193334

Our property came with a pile of old wooden fencing. I’ve used it here and there for various things and this raised bed is one of them. It is about a foot high, and 10 feet square. I planted asparagus, pumpkins and zucchini into this bed. For the pumpkin and zucchini I put a big hole in the middle of the bed for watering and planted the seeds around it. It worked pretty well. Also around the entire perimeter I planted marigolds. They got HUGE!

20140717_182444

20140717_182022

RAISED BED GARDEN

I really have nothing bad to say about my raised bed. Everything in it grew large and fast. I had more zucchini than I knew what to do with. It worked great! In 2015 I’m going to plant my tomatoes and peppers into the raised bed instead of the straw bales.

 STRAW BALES:

Verdict: Failure

20140617_193146

Pumpkin plants growing in straw bale

 20140617_193047

 Mushrooms growing out of straw bale

bell peppers

This picture sums up my straw bale experience. I fertilized with chicken poop for about 3 weeks before planting. I also added dirt into the planting hole and mulched with extra straw over the top after planting. Nothing did well in the bales. The straw bales were planted out weeks before my raised bed but the one pumpkin I planted in the bale never produced while I had several pumpkins from the raised bed plants. I had 4 bales. The pictured bale had bell pepper plants in it. I had 2 with tomatoes and one with squash. Again, nothing did well. I did have mushrooms popping out, which I was told meant my bale was decomposing like it was supposed to. It just didn’t work out. I would not do this again. The only benefit is that I had nicely fertilized straw to mulch my other beds with in the fall.

STRAW BALE GARDEN

Fertilizing straw bales.

TIRES:

Verdict: Undecided

 TIRE GARDEN BEANS AND CORN

20140717_182050

corn and beans

peas

 20140717_182032

peas and sunflowers

Tires, my favorite material. I had one large, square, raised bed in the middle of my kitchen garden. On two sides I had two tires set up. I planted potatoes in one, carrots in another, beans and corn in another and sunflowers and peas in the last. The dirt was a mixture of my clay soil, horse manure compost, peat moss and straw mulch. The potatoes did very poorly. I had nothing eatable from that. BUT I just planted store bought potatoes which may be the reason for that. The carrots also did poorly but I know I did that. When I did the initial watering of the carrot tire it washed all the seeds to the very side of tire. Big mistake. So they never got very large. The peas did well and I did get some 4′ sunflowers as well. I got maybe 2 green beans and no corn. They grew up tall but nothing ever happened with them. I did plant peas and beans in my swales and they did much better there.


potatoes

potatoes 2

carrots

 I will use tires again I think. I’ll try potatoes in them again. The other tires will be used for spreading herbs though. I’ll plant my veggies out in the berms, it did better there.

 BROADCAST SEWING ON BERMS- LATE SEASON:

Verdict: Triumph

green berm

In late July I bought a ton of different seeds and simply threw them onto my berms. Not everything did well but most of it did amazing. I’m a big fan of broadcast sewing now!

Strawberry Pyramid

I have been quite obsessed with tires as a building material. I know many people dislike them because of the chemicals that can potentially leech out, but I love them. My first tire project was a sand box for the kids. After seeing how easy it was and how nicely they held plants I decided to make a strawberry pyramid. There is a local tire shop that is quite used to me now. In fact they searched around and brought me the top tire of the pyramid because they knew I would love the texture of the tread. I do indeed love it!

To start I laid out my tire pattern. Once I decided how to stack the tires I cut the sidewall off of one side of each tire. I then laid out the bottom tires and filled them with dirt. That beautiful little car in the pictures is what I used to transport compost from the neighbors horses. I had a big tarp (the one in the picture) in the trunk and I filled it up. It took several trips but I’m happy with the results.

strawberry pyramid

The kids LOVED to climb this. In fact our daughter couldn’t walk but she could climb this thing like a champ. We got so interesting over here that the ducks even had to come investigate:

 supervising

Like our pile of materials? All of those pallets went to the tree line to help with wind protection. We had some bushes die last winter. The boards went to various projects.

As for the strawberries, I did plant and they grew pretty well. Not a harvest-able amount but my son was happily picking and eating whenever a berry turned red. I have more berries to plant this spring so I hope we get enough for shortcake. Unfortunately, I foolishly didn’t take any more pictures of it and there is nothing to see right now. I will update in summer 2015.

As far as strawberry varieties, I really want to see if I can get some amazing ones growing. I’ve bought the following seeds/roots:
Pineberry, Alpine Strawberry and Evie Everbearing Strawberry.

So far the pineberry has not germinated. I have had success with growing strawberries from seed in the past, so I’m hoping the seeds will germinate soon. If not I will buy the bare root plants I found on Amazon. I really want to try the pineberry variety.


This post may contain affiliate links

Bush planting experiment

I have 40 acres of mostly unused land with pretty much dead dirt. Our house came with an established tree line/wind break that has Caragana bushes as the first planting. These bushes are thriving and sending out constant new shoots. These bushes also fix nitrogen. So I decided to dig up some shoots and see if I could plant them in a far corner of the property. I dug up 11 saplings and marched over to a dead corner of our land. There I dug holes as deep as the shovel head, about 1′. Then I planted the saplings in the bottom and filled the hole entirely with mulch. I forgot about them for awhile and when I finally remembered to go check they were looking a little wilted. So I took some wine bottles (I save all my wine bottles) and filled them with water. The wine bottles work just like those aqua globes you see advertised on TV. I only filled the bottles once. Otherwise the bushes were on their own. I’d say 80% survived my neglect. I would probably have some amazing bushes this spring, except the rabbits got to them. I’m not sure if any will recover from that.

CaragannaCaragana parent bush in established tree line.

 removed mulch

Sapling as seen in hole without mulch. This was taken the day we watered them.

 watering bush

Son helping me insert watering wine bottles into plant holes.

 bush in hole with mulch

Plant covered in mulch and growing well.

eaten eaten 2

Pictures of the bushes now. Showing some green but chewed up by rabbits.

If you want to get some nitrogen fixing Caragana seeds
and give them a try I find them prolific and a joy to have around. The bees love them as well.

On another plus side, I now have well fertilized holes on my property thanks to this experiment and rabbits.

OLYMPUS DIGITAL CAMERA

OLYMPUS DIGITAL CAMERA

Orchard planting and seasonal progression- Year 1

I ordered my trees from Stark Bros and had them delivered in July, not a suggested time for tree planting but it is what it is. I immediately began my earthworks after placing the order. Then I painted tree stakes and laid out my plantings. I finished just in time.

tree box

I was amazed at how small the boxes were, and a little wary. I began unboxing and soaking my trees immediately.

tree close

Please excuse the mish mash of detritus in this picture. This is my unboxed tree showing some leaf budding. I went about painting the trees white while they soaked. It was July and I did not want my new trees to get sun burn.

painted trees

All painted! You can see that I have a lot of shredded paper in there with my plants. I wasn’t going to be able to plant them all in one day, as I had 36 and was planting alone, so I “hilled” them in their containers.

tree

Here is a happily planted and mulched tree looking very much like a stick. I just knew it would grow into a beauty! You can also see my hand painted stake used to identify the tree and plan out the planting.

trees planted

It took some time but I managed to get one full berm planted and mulched. I left spaces in some spots for cherry trees, which had been sold out when I’d placed my order. The mulch is extremely moldy straw that has been sitting in a corner of our property since before we moved in.

sprouting 1

I was extremely happy to find that within weeks I had some beautiful leafing. I was concerned about two of my trees though as they were not showing leaves. I hoped they made it. Thankfully they did, they just took a lot longer to adjust than the others.

growing fast

Now look at this, a very happy boy helping me show the height and growth of our trees. This tree just shot out quite impressively. It is a Superior Plum tree, standard sized. My son happily walked the berm line with me nightly, talking about how excited he was to pick fruit off of the trees. I don’t believe he realized how long he’d be waiting though.

black leaves

I did have some issues though. I am not positive but I believe we had some blight. You can see the black leaves in this picture. I took shears and cut all the black off, bleaching between prunings, and then burned the clippings. I hope I do not see it this year.

20140801_194801HUGE lettucve green berm

After I planted the trees I threw out a great variety of herb, salad, vegetable and flower seeds. It was late in the season but I had some amazing lettuce growth. This lettuce reached 3 feet in diameter with leaves bigger than my head. I had poppies and nasturtium do well. I also had a ton of various lettuces.

20140921_135352berm

I cut some bushes down and threw all of the branches into my swales.

kids with letturce

Most of the berm produce went to the poultry. I did save what seeds I could for this springs planting. The kids loved bringing the poultry goodies.

trying lettuce

I find kids will try about anything if they can pick it. Though that doesn’t mean they’ll like it, as seen here:

spitting lettuce out

We had quite a few beets grow and the turnips grew absolutely massive in size. My son happily washed and bit into every plant he picked. He thought the beet was sweet but he had quite an attack when he bit into a turnip. I licked it and understood why, it was incredibly spicy. The chickens adored those turnips though.

turnips(excuse the mattress behind the kids in this picture. It is our old bed, which I stripped down to the frame and intend to use as a trellis this spring. You can see the stripped frame in one of the pictures below.)

pruning

I did prune, not much, but a bit. My Son was anxious to help me with that job. Here he is cutting some suckers off of the bottom of the tree. Great view of one of my tree markers as well. Superior is the type of fruit, Then you can see Plum written under it and the S stands for Standard sized root stock. So this will be a standard sized superior plum tree.

mulch rocks mulch tires

Then it was fall and time to protect my trees. I ended up transplanting my grapes onto the berms, under the standard sized fruit trees. Where I planted a grape I used cement to hold down the mulch. It has worked quite well so far. I used the walls of tires to hold the mulch down around my black walnut trees. That has also been a successful method of holding mulch. We get some impressively fierce winds out here, 40-50mph is normal for us.

Now to wait and see what happens this spring. Did all of my trees survive? I am hopeful. The berms and swales did an impressive job of collecting snow so I believe my trees have received a decent amount of water. It has been a rather dry winter so far. We still have snow collected in the swales and in some of the water diversion ditches so I would say the earthworks did the trick.