Vintage Chick Feeder as herb garden

I’m so excited to have found this piece in an antique store recently. It is going to look amazing on the new island, or the table. I have options. I’ve started the herb seeds in it today. I’m interested to see how good I am at growing them indoors. I’m usually a pretty big failure at it. Anyway, take a look and keep an eye out for this amazing piece. Would make a great organizational tray, drink caddy, etc, etc.

IMG_3558 IMG_3552

A simple organizational upgrade

The item that kicked off our kitchen renovation was a simple coat rack. Simple but life changing. Our garage enters into our laundry room. We have a front door but it is literally never used, ever. Everyone comes in through the garage. We had no closet there. We had nothing in the area that would work as one either. Coats were taken off and thrown onto the dining table. I HATED it. So I ripped down a wall, planked a lot, started going crazy and made coat and shoe storage. Life changing! It’s not very nice looking though. We have a rather large variety of stuff to keep there. Farm coats, pants, gloves, boots and going out in public coats and shoes. It was getting stuffed. I was getting annoyed again. Luckily we have a wall in the laundry room that is used for nothing. The bathroom door opens onto it so you can’t store anything there without blocking the door. Anything, that is, but coats.

Since I’m TERRIBLE at discovering where studs are I simply mimicked the style of our current coat rack and cut two 2×4’s to length, stained them and screwed them up, a lot. Then the same style hooks were added with the exception of a coat rack we already had that had been falling off the wall for years and holding our ironing board. That got screwed onto the 2×4’s and is still holding our ironing board.

Took no time at all if you don’t count stain drying time. Stud 2×4’s are cheap and the hooks I’d bought were around $3. So I’d say this was one of those under $10 projects.

Ah I shouldn’t say that as I bought a bucket to hold our hats and mittens, which were out of control with everything else. That was $12.99,

Anyway, few pics. Nothing big. Well it’s pretty big for me. I like having the extra storage space. For 4 people we seem to have the clutter of 20.

Before
Before
After
After

IMG_3545 IMG_3546

Oh and in case you are wondering, kitchen is a bit different now. The living room too. That’s what happens when you whack a hole in the wall. I like whacking holes in the walls! Kids do too!!

IMG_3538 IMG_3542

3 people can knock a pretty darn big hole in the wall pretty quickly.

Life, as it has become

Staying home has been different. I have so much more time for projects and yet…not. Kids have a funny way of doing that.

I’m doing things I haven’t before as a mother. I’m not used to making their breakfasts or their lunches during the week. Of course I had enough requests for bacon and eggs today that sometimes they’re rather indistinguishable. Home made chicken and french fries is always a hit. Today it was picnic on the floor lunch. This always ends up torturing our giant dogs who sit a respectable distance and wait for the kids to abandon their plates. Oh how many tears have been shed over abandoned plates being consumed by ravenous canines.

Picnic

I am often lost on how to occupy them as well. I’m anti-electronics, which limits my winter time options. Luckily we have an unfinished basement. Unluckily the spiders loved our unfinished basement. So we fumigated. It did a pretty decent job. Now I’ve simply had to clean up all of the stuff we’ve left down there. It appears that whenever we had something I didn’t know what to do with, I simply put it in the basement. Procrastination is my thing. Things are cleaning up nicely and the kids have all of the things they’d not normally be able to play with in the winter. We have bikes, scooters, roller skates and some large plastic tractors down there. We also moved 1/3 of their toys down there. It’s been a great place for us to go and work off some of this winter time energy.

I’m also trying out this whole kids crafts thing. They’ve finger painted (whole body painted is more accurate) on a tarp in the living room whilst I mudded the new drywall. We’ve done pipe cleaner building. Ok, ok, I’ve built things with pipe cleaners and the demands were pretty ridiculous. They each have their own boxes of personal supplies: pencils, glue, scissors, etc. Things are going pretty well.

IMG_3523 IMG_3520 IMG_3519 IMG_3525 IMG_3531 IMG_3534 IMG_3536

Still, I’m struggling. They want TV. It’s blizzarding. I’m out of occupying ideas. I guess one show won’t kill them, or me.

Speaking of me, well I might just drive my poor husband batty. He came home one day to find our bedroom furniture in the burn pit. I did some re-arranging to say the least. Every day he comes home and something is different. Walls are missing, walls have appeared, stuff is in different places, I’ve got a new project. Building trains with the kids had me close to the windows and….

IMG_3518

I think I have an idea about what to do with one really tall one. Now to get the right plants and some planters and and…..sigh. Help us!

Wine Review: Purple Paws Moscato and Apple Smoked Gouda Cheese

1

[Image Source]

Wine

Purple Paws  Moscato         $11.99

Description:

[From the wine makers website] Our winemaker always enjoys crushing Muscat because he says time stands still as you take in the floral wisps and watch the bees circle around you in slow motion. This moscato enjoys all those floral characteristics ubiquitos in this varietal. This wine pairs well with patio guests on a hot summer day or light desserts.

Cheese

    Apple Smoked Gouda

Description: [From the cheese makers website] Our smoked cheeses are slowly & meticulously, naturally cold-smoked for six hours using a special aged Apple pulp and hardwood to achieve our unique flavor profile. 

IMG_3320

Wine Review:

This wine was pretty gross. Not what I’ve come to expect from moscato. I wouldn’t suggest it to anyone. It wasn’t bubbly at all. The flavor was lacking that normal moscato sweetness. Perhaps if I hadn’t opened this wine expecting a moscato I wouldn’t have been quite as disappointed. Unfortunately I was quite disappointed

Cheese Review:

We loved it. Even I loved it. In fact we ate all of it in one sitting and have bought these cheese twice more since Christmas. It’s lovely on it’s own, goes great with sausage and crackers, pairs well with about any wine I think. It’s just a great over all cheese. Definitely something to keep waiting in your refrigerator.

Neem oil review

My Neem Oil Review

In THIS post I mentioned problems I was having with pests on my indoor houseplants. BIG problems. I tried various methods of control to no avail.

Neem oil was one of those methods. I sprayed it onto my plants. It is often recommended online as a means of controlling houseplant pests. I would not suggest it. It seems to have damaged my plant leaves in places.

IMG_3501 IMG_3493 IMG_3492

I acknowledge that my plants were under serious attack and leaf damage was caused by houseplant pests. Still, I have continued to spray my plants as a precaution so this damage is most certainly from the neem oil.

I do have healthy new growth though.

IMG_3495

Jasmine

IMG_3505

Black Peppercorn.

My peppercorn plant was so damaged at one point I was convinced it was not going to live. It’s doing great!

So why am I down on Neem oil if it does seem to have eradicated the pests? Well it didn’t. I’ve been physically washing the plants off in the sink every time I water them. It makes a big difference. And as you see in this peppercorn picture (kind of) I still have little eggs on my plants, so the neem oil is not repelling them.

IMG_3502


One other plant worth mentioning is one that was a bit of an accident.

Rosemary

This is a rosemary plant I bought around Thanksgiving for cooking purposes. My lovely Daughter keeps yanking the leaves off of my larger plant. In fact it’s a small plant now as she’s lopped the top off. Anyway, so I bought this one from the grocery store and I didn’t think it’d live particularly long. I put it in this mason jar just to collect water as it sits in the kitchen window sill. I’m rather lazy so the jar has filled up with water over time. I was surprised to see the rosemary roots growing down into the water and the plant flourishing under these conditions. Rosemary, from what we’re told, is a dry loving plant. I think I’ll water mine a lot from now on.

Rosemary roots

The fridge has been moved! Also, how to make your own rustic faucet and sink.

The day has finally arrived. The stars aligned and the fridge has been relocated. My biggest obstacle to removing the main wall has been eliminated. Gosh I’m nervous. I’m removing a main wall. Eeeks!

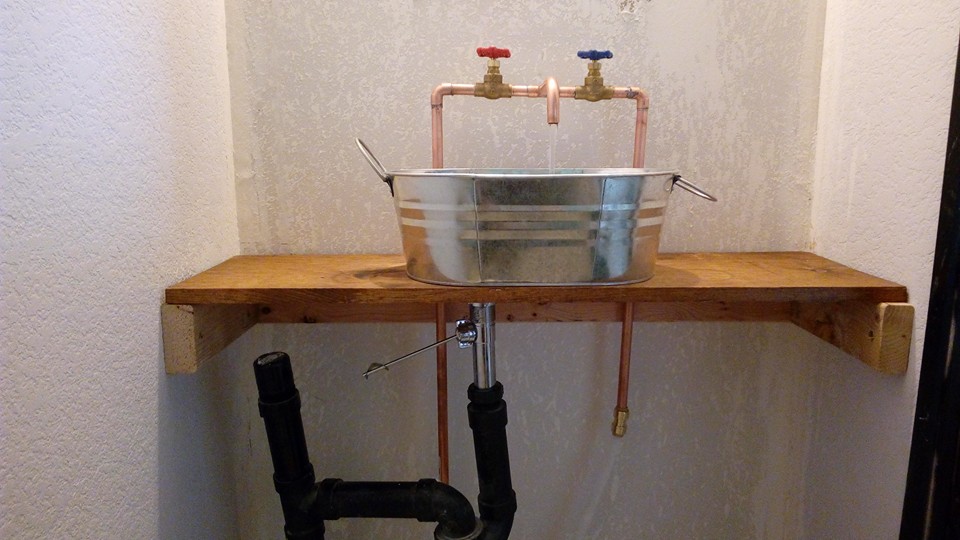
Enough of that. Let’s talk what happened this week. I soldered for the first time. Soldered a faucet. Then I made a sink and a counter and TA DA! Bathroom is now fully functional again!

How to Solder a Custom Faucet

A bit about soldering, it’s not that hard. It seems hard. I procrastinated on it. Then I did it and it was so easy I had no issues at all. This is a first try faucet.

IMG_3472

Entirely hand made by moi! Allow me to show you how:

IMG_3403

Whilst the kids were supposed to be sleeping I gathered my supplies. I cut the pipe to the necessary sizes, cleaned all of the fittings, donned gloves and began.

IMG_3407

I put a small amount of flux on the inside of my fitting and the outside of the pipe and put them together.

IMG_3456

Then, over a small flame, heat the fitting from the bottom. You’ll know the metal has reached the correct temperature when the solder melts within 2 seconds of touching the pipe.

IMG_3438

You’ll see the solder get sucked into the crevice. I put on a bit much my first few solders but with time I began to figure out the perfect amount.

IMG_3446

Thicker fittings take about a minute and a half to reach temperature. The regular copper fittings about a minute.

IMG_3450

The pipe that you aren’t soldering, but are holding on to, gets HOT. So do be sure you are wearing thick gloves for this.

IMG_3453 IMG_3452 IMG_3455 IMG_3457 IMG_3454

They really aren’t that sneaky. They think they are though.

You can polish up your finished faucet by simply smearing flux on, heating it and then wiping it off with a cloth.

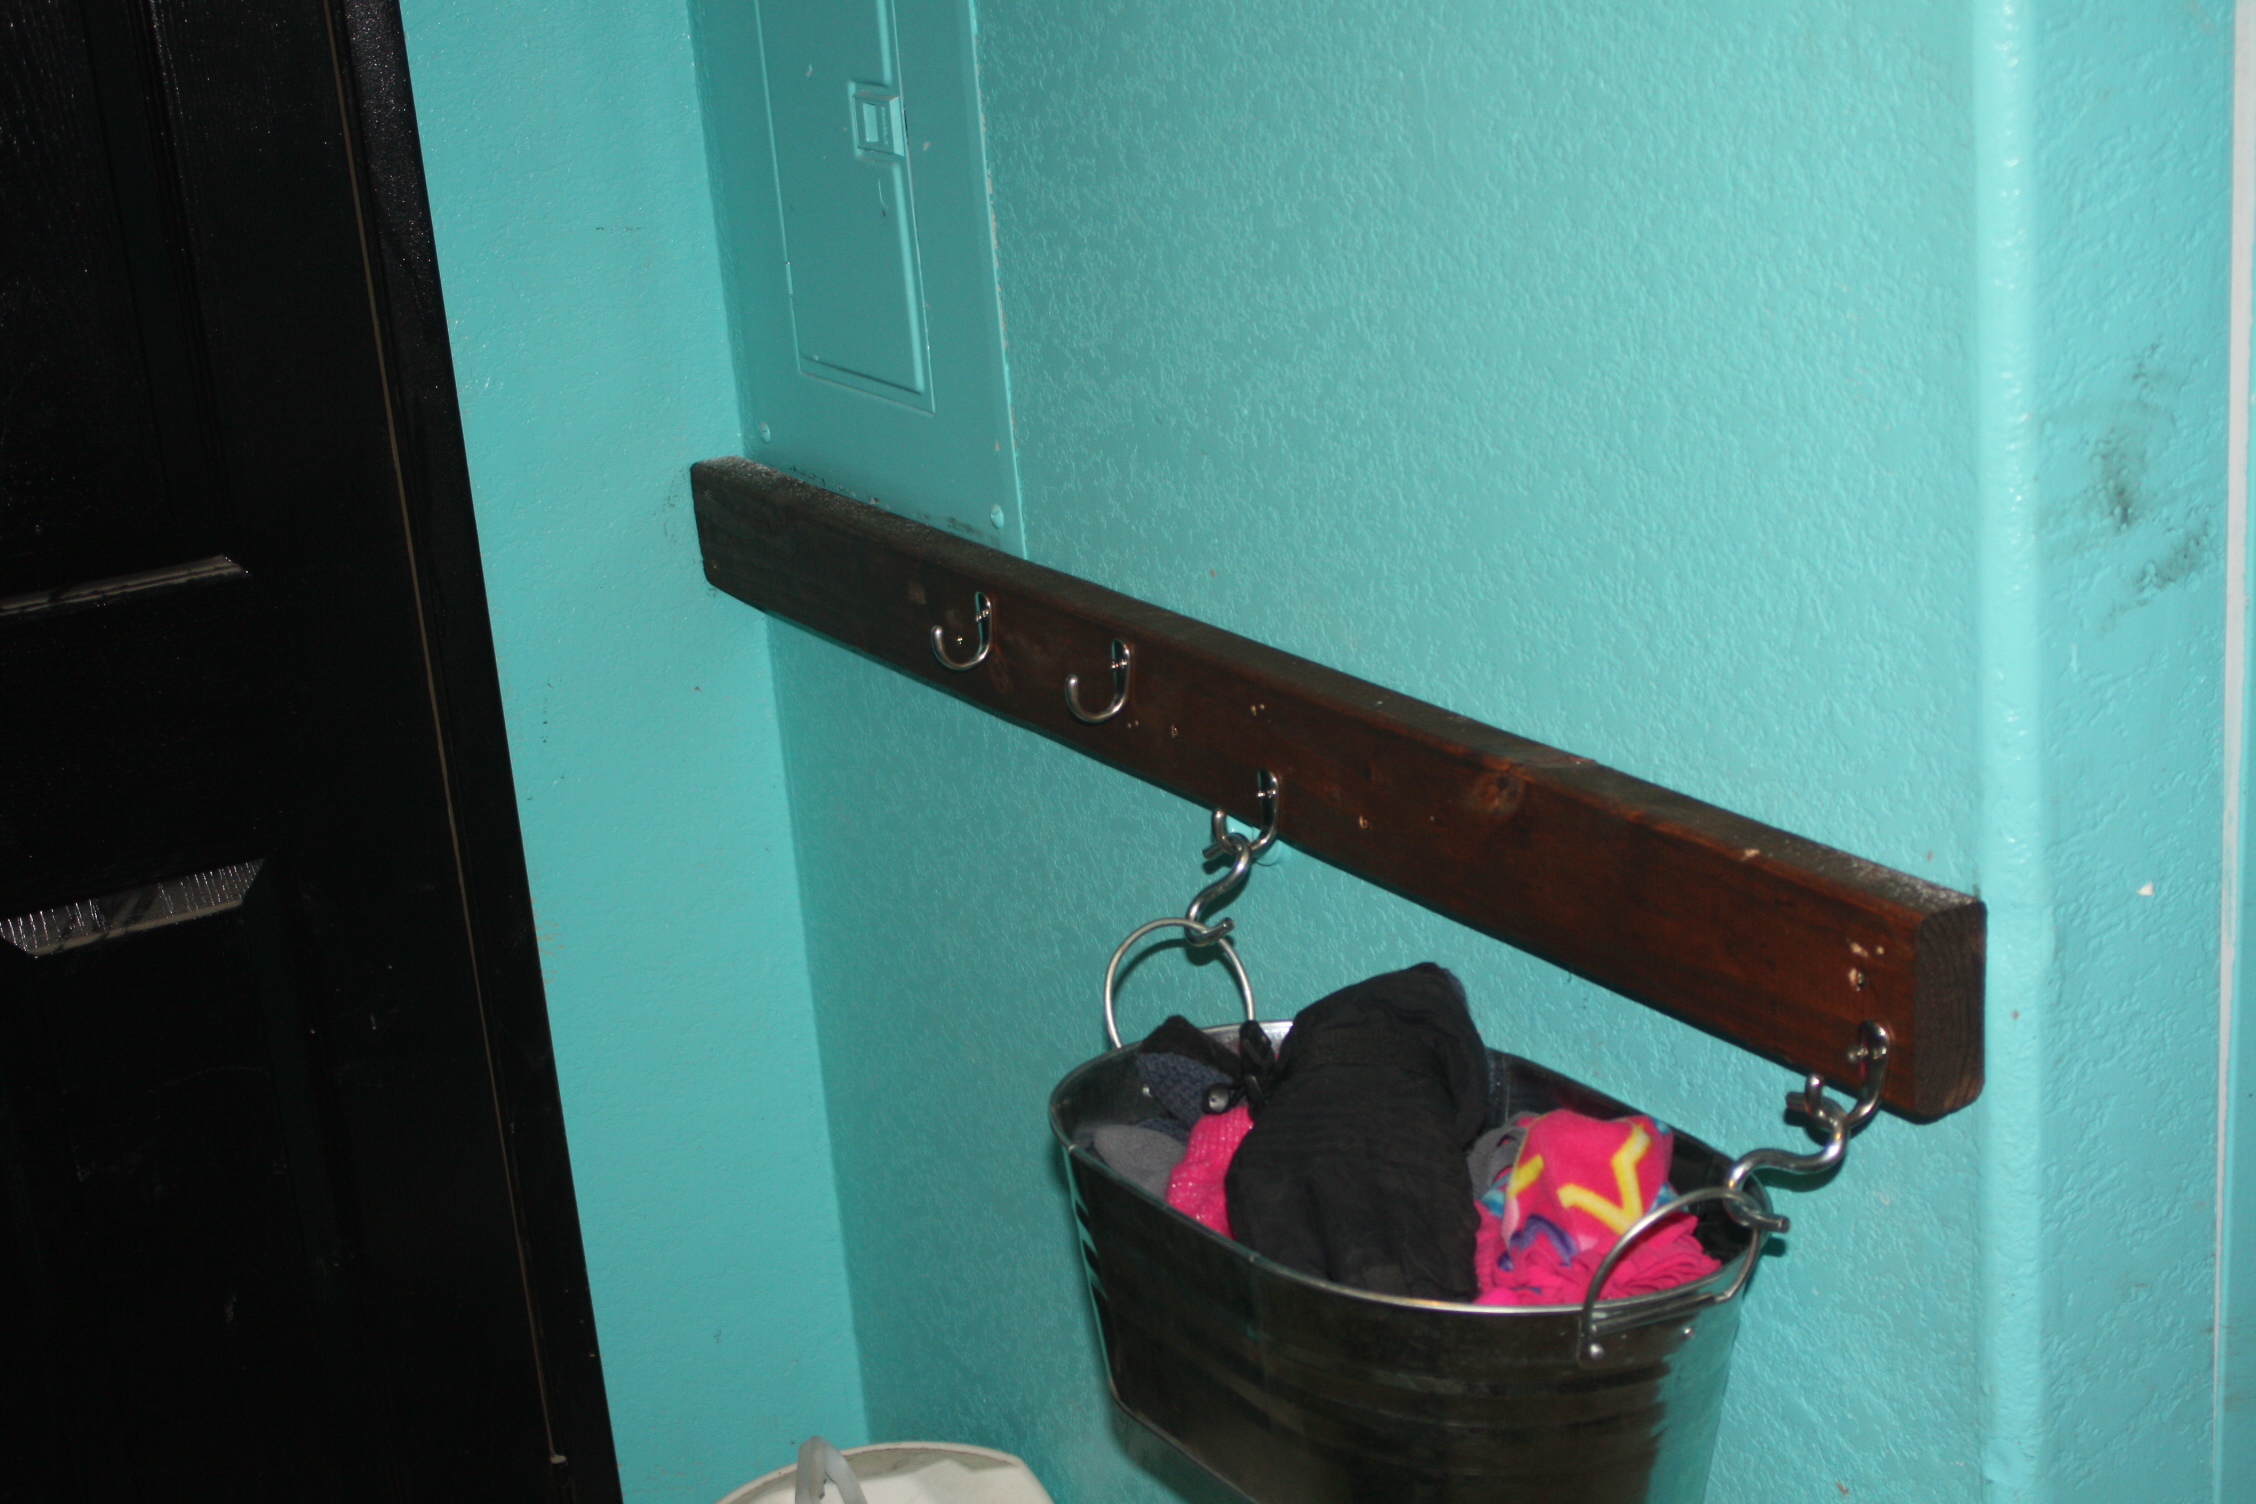
Now, on to the sink I made. I bought a bucket at the farm store. A beautiful bucket. I arranged it just so, then marked the bottom as to where I needed to drill the hole.

IMG_3468

Then I gathered what I needed to install the drain onto my new sink.

IMG_3470

I bought a basic sink drain fitting, some plumbers putty and some plumbers caulk. Couldn’t be more basic. Put a ring of putty around the drain fitting, screw it on, caulk it and you’re done.

Completed

It’s GORGEOUS!!!!!!!! I have a burlap skirt that just needs a few staples to cover the front of the sink. It’s country perfect! Oh I should add we just shark bite’d it on to the old pex pipe. Super easy installation.

IMG_3484

I was simply waiting for the bathroom sink so I could move the fridge. I attached the ice maker water tubing through the wall on to the bathroom sink. No leaks, fridge fits, it’s a dream come true!

IMG_3477

Had time to stain the pantry shelves,

IMG_3481

Fly a kite,

IMG_3485

And admire the pantry shelves.

What’s next? Well other than the details, like doors on the pantry and finishing the plank wall that is going to be the last pantry wall, well this:

IMG_3487

This hideous wall.

IMG_3488

The entire thing. It’s all going to go. A giant island will take it’s place. A glorious, giant island. Oh the vision I have for it is so strong. I’ll be able to move around the kitchen better what with kids and dogs constantly observing and attempting to assist me. I’ll be more connected with the kids while I do daily tasks such as cooking and dishes. We’ll have a lovely counter top eat in section. I just know that this island is going to bring the family closer. So long as Husband can survive the destruction first.