First Turkey Processing *Graphic Pics*

Turkey Processing

I have this addiction to buying birds. If they go on sale, watch out! So one year it got a bit out of hand. I bought 5 Giant White turkeys. Unfortunately only 1 lived. We named him Lucky. One of the only birds to ever be named on our property. Shortly after that we bought 9 bourbon red turkeys from a 4Her. After that I was buying food and there were broad breasted bronze turkeys on sale. I bought them all, 10 in total. Feeding time got a bit crazy!

the kid is surrounded!

We suffered some deaths. The Bourbon reds kept flying into the dog run and getting eaten by the dogs. I had one broad breasted bronze die from an unknown disorder. Otherwise they did well and grew quickly!

Gobble!

I really loved the turkeys. I just enjoyed having them around. They were funny and slow. Our Son could pet them like puppies. Just enjoyable birds. Unfortunately they were food and it was the weekend before Thanksgiving. We gave most of them away but sold a few. We invited friends over, had my parents watch our kids and got to work killing.

First we got the scalding pot ready. Our scalding pot is an extremely large tamale pot that we got at a flea market in Denver. We heat it with this Bucket Heater. This is the actual bucket heater we bought and use. It is an affiliate link. It was extremely cold the day we did this and it took some time to get the water up to temp. We finally elevated it off of our freezing cold concrete on some blocks. After that we did not need the heat gun to help. The bucket heater heated it just fine.

water check

In anticipation of this day we bought a plucker. Boy am I glad we did! Now I have hand plucked birds. It’s not bad if you are just doing 1. It is bad if you are doing more than that. It takes a large amount of time and can really make a persons fingers ache. So while this plucker was mondo expensive I’m glad we have it.

plucker

We caught the bourbon reds first. I thought it would be wise to do smallest to largest. The men were killing, scalding and plucking and I had a friend inside who was helping me gut and bag them.

hanging

We hung the birds up and slit their throats. Not pretty but effective and imo, humane.

Ivan and BBW

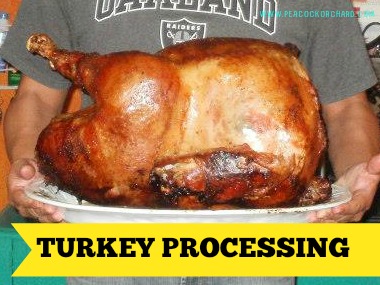
Here is my beautiful husband holding our large broad breasted bronze Tom. He had a processed weight of 35lbs.

plucked

Yup, that’s him.

35 lb

Doesn’t that plucker work fabulously!

“Lucky” was last. He was 60lbs live weight. Quite the bird to catch and haul.

Lucky

Took 2 men to hold him for scalding.

scalding Lucky

cooked Lucky

Took our entire oven and 1/2 a day but Lucky tasted fabulous!


Playground slide transformation


Our little playground did not survive the winter well. The swing set is badly damaged and the slide supports broke completely off. My children LOVE sliding and I heard a lot of “Fix it Mommy!” from my oldest. I also had this giant pile of tires that was not going to be able to remain in the playground because of black widow problems. So I killed 2 birds with one stone and used the tires as the structural support for a new hill slide.

OLYMPUS DIGITAL CAMERA
Tires Before
20140617_200247
Slide Before
After
After

As my husband used the tractor to cover the tires in dirt I stripped the slide of any remaining screws and supports and hunted down some tools. Armed with a variety of shovels (my helpers always require their own shovels!) and a rake we went to work grading the hill and installing the slide.

Hill top leveling

Son was energetic in his digging but daughter was much too distracted with the chickens scratching around near the fence. I think I found the right angle for the slide.

Working on slide placement and leveling out the top of the hill

Hmmmm. No. I think it is much too high.

Testing the slide placement

Better! Though I’m sure the poor sea creatures didn’t like their trip down the slide.

Now off to hunt for rocks to be used as the steps. I loaded Daughter into the wagon and Son energetically hopped onto his tricycle.

Collecting rocks for steps

Success. I was able to grab quite a few rocks of unknown origin, the one Daughter is sitting on was the largest I could carry.

Rock steps in place

I rocked the stairs up but I just don’t like it. That large piece of cement rip rap is not working for me. What to do….

11043229_10153143733593633_4129447569467125658_n

That’s the ticket. Gravel on the top of the hill and the large cement rip rap has become a designated art piece. The kids loved painting it! While they were busy painting I was busy terracing the back side of the hill. I don’t want a rain storm to cause massive erosion. Now I have perfect planting terraces.

Nice view of hill Magnifique!

I spent some time thinking about what I wanted to plant here. Grass, of course. But I want plants that are going to repel bugs and rodents as well. So I believe I have settled on a few varieties of mint, lemongrass, feverfew, lavendar and safflower. We shall see how they grow!

Tire Sandbox

Make a Sand Box from Old Tires

Tires are a material I really love. Free, versatile and fun. So when I saw this Pinterest post I knew I had found an ideal sandbox idea. So I started collecting tires from a local tire shop. The first step was cleaning them. I used simple dish washing liquid and a car scrub brush. Then I cut the ones that I needed to cut in half. I did this with a linoleum knife Like this one for the sidewall, and a metal cutting blade on a regular circular saw for the tread.

Tire cut in halfI painted all of the tires with regular spray paint. I just bought cheap stuff from Wal-Mart.

IMAG1279

I used about 2 coats per tire. The larger tires required an entire bottle of spray paint. Now, some of the tires did not take the paint well and flake something awful. I’m just living with it.

IMAG1289

Next I laid out  my tire pattern and dug holes for the halved tires. I did cement these tires in. I then stacked the whole tires, filling each with dirt as I did so. I was ramming dirt into the interior of the tires but even so there has been some sagging where I did not fill them enough. I’d suggest using a sledgehammer. I found the tires to be a great way to keep Daughter entertained. She wasn’t able to walk at this point and wasn’t very good at standing. The tires were perfect for helping her with this!

IMAG1284

IMAG1286Son was just entertained.

Once I had my tires stacked and ready I laid landscape fabric on the ground, tucked it into the tires and began adding sand. It took a lot of sand. I had bought 6 bags to start with and it barely covered the bottom of the sandbox. I think we are about 20 bags in. This would work great if the stupid dog seen in this picture didn’t keep digging in the sandbox.

sandbox

Anyway, the sandbox has been working well. We have had bug issues. Black Widow mostly. I have to check everything before I let the kids out to play. I am going to fix that issue with cob this year.

This post contains affiliate links.