Improved poultry processing equipment

Turkey Processing

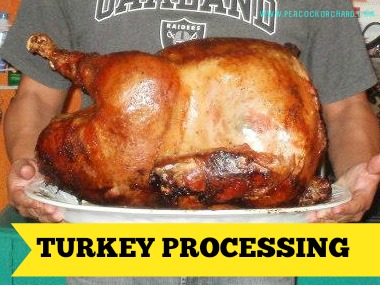
I’m unsure the exact number of birds we have processed at this point. We’ve done 2 large batches of turkey slaughters (10+) and killed a lot of chickens. Thanksgiving dinner was to be killed by us again this year. We weren’t particularly sad about our turkeys demise either. They liked to bite and annoyed me most of the time with their “in your face, try to eat your fingers and eyeballs” attitude. These two turkeys were quite unique. The last turkeys we had weren’t nearly as brave as these two. Anyway, so we secluded our 2 turkeys and 10 of our adult chickens. Our chickens are eating their eggs so I had decided they must all go. My sister-in-law brought over her 9 giant white turkeys and help. Help is necessary when doing a large quantity of turkeys, in our experience. It takes about 3 people to do a large turkey processing because of the size and strength of the birds. Our last turkey slaughter required 2 men to scald a single 62 pound bird because of the weight of the wet feathers.

Moving on though, we improved our equipment this year. Husband made 2 turkey sized kill cones and he also insulated the scald pot.

The scald pot is a real issue for us. It doesn’t hold the temp very well and we’ve had under and over scalded birds on the regular. A usual processing required large pots on the stove, simmering to help with the scald pot. Not so this year. We finally have the ideal method!

Our scald pot is a large tamale pot. We heat it with this bucket heater. We keep the tamale pot off of the ground with a few cinder blocks. The tamale pot is a great size for doing large turkeys. The largest we’ve ever done was 60lbs live. So the tamale pot has now been insulated. Husband wrapped insulation and tinfoil around the outside and cut big foam blocks to put on the top and bottom. It worked a dream.

IMG_3151

IMG_3153

scalding pot

We’ve used quite a few thermometers from your basic meat thermometer to a pocket dial thermometer and have finally settled on Thisthermometer as the most accurate and sturdy, at least so far.

It was cold out so the people outside were all wearing gloves. This made scalding difficult as the gloves would get wet and then be useless. We were happy to have the Gator Gloves we discussed in earlier posts for keeping leather gloves dry.

The kill cones were made out of sheet metal and hung in our lean-to. The turkeys fit in them just fine. To modify them for chickens we took a milk jug and cut the top and bottom off. The jug could be inserted into the kill cones to hold the chickens.

IMG_3158

Husband will do a guest post explaining the dimensions and process he used for making these kill cones at a later date.

The plucker we have got clogged up once with feathers but otherwise worked a dream plucking all the birds.

plucker

IMG_3159

The plastic tub and buckets were used to put water into the plucker as it was too cold for running water.

IMG_3156

Rope was hung from the rafters in our garage to store birds while they awaited evisceration. There were 3 men doing the killing and 2 people inside doing the eviscerating. With the kill cones the men were able to kill the birds far faster than we could eviscerate them. This method of holding them over worked just fine as it was cold enough outside it acted as sufficient icing of the birds.

We bought a knife kit from Wal-Mart and it’s worked just fine for the most part. A few pieces just broke and I really only used a single knife from the set. We’ve since advanced and I use This knife to do everything. It’s been great so far. We’ve also started using a bone saw this year. It’s done a great job at sawing off heads, usually the hardest part, at least when you’re doing the eviscerating on your kitchen counter and can’t go at it with a hatchet.

We’ve bought shrink bags before and I do recommend them. They work really great. However, this years turkeys simply went in garbage bags, as they’ll be eaten quickly. The chickens went in regular old gallon freezer bags. That’s working just fine so far as well. I’d say the shrink bags were easier in a way. We did wrap the turkeys in plastic wrap before putting them in the garbage bags. The shrink bags eliminate that step, but they do ad others. I think I’ll place a mass order of shrink bags for future processing, however. As far as where to get those, that’s a toughie. I’ve only ever found them sold by bloggers.

To weigh the carcasses we put them in a grocery bag and then use this Scale.

IMG_3162

Lucky chicken and turkey foot recipient!

As far as our preferred cooking method goes, we like to dry brine before we wrap them up, fresh as can be. Turn them twice a day and keep them in the fridge until Thanksgiving. Then we use Gordon Ramsey’s citrus cooking method. It’s AMAZING!


This post contains affiliate links. These are products we have actually purchased and can attest to.


Farming means you sometimes have to do the unbelievable.

Rocker-Digger

As I’ve already posted here, we got pigs on the farm. Two of them, small and of unknown age. We have grown to really enjoy the pigs, well I have. They make the most adorable noises and do the most interesting things. I like how excited they are to see us and how they sniff our shoes to smell the dogs (just like the dogs sniff our shoes to smell the pigs). Their eyes are almost human as well.

Fighting

B.L.T has become quite comfortable being petted by us. He is a very friendly pig. Rocker-Digger isn’t as friendly but he’s not as skittish as he was either. At least he was getting to know us. He probably hopes I trip so he can chew my leg off now. What do I mean by that? Well we had our pig’s anus sown shut.

I’m amused just typing that. I shouldn’t be amused, it was awful, but it is kind of, sort of, funny. So I woke up to a nice snow on November 17. I went to feed the pigs and noticed the most awful thing on R-D. He had part of his anus hanging out of his butthole. I’ve tried to think of a nicer way of saying this but it can’t be done. It was bloody and big and red and be thankful I didn’t take pictures. It was nasty. I run inside and hit Google to find out what is going on. Anal Prolapse (don’t click on that unless you want to see graphic pics). I do some reading and it appears that you can push it back in and it’ll be ok. It is also suggested that spraying it with cooking spray may help it go back in naturally. So I grab some rubber gloves, cooking spray and what little dignity I have and go out to shove my pigs butt back into his body. I try to trick him with some hot oatmeal. He does want to eat it but not enough to let me touch his butt. I’m chasing him about when Husband comes in and helps me corner him. The internet had said to be rather gentle. So I tried gently pushing it back in but it wouldn’t budge. So I spray it generously with cooking oil.

We go inside and I decide that perhaps I should just call a vet to see what they think before going to work. I do and JEES. It’s far more serious than the internet led me to believe. The vet tells me to go back out, hold the pig up by his hind legs and shove his anus back in like I’m folding socks. I repeat this many times as I can’t quite believe what is about to happen. Husband goes back out with me and we play chase and wrestle with R-D until he is finally captured and hoisted up by his back legs. I shove his anus back in and it actually works. I’m so relieved. Husband lets R-B go and as soon as his feet hit the ground, POP, it’s out again. Crap! The vet said if that happened we’d have to sew it in.

I call the vet back and hours later we are at the vet, R-D very sadly in a cage in the back of the truck. The kids are with us and I have prepared them for what is to come. R-D is going to scream. He’s going to be in some pain. It’s ok though, we are going to make him better and we can give him extra juicy apples when it is all done. I  load the kids up with books and toys in the Vet’s office and Husband and I go with the vet to restrain R-D for the procedure. So Husband has R-D’s legs and I have what may be the worst half, the biting half. I’ve thrown a sheet over his head in what may be ineffective to stop biting but makes me feel better at the very least. I’m sitting on a bunch of pallets with R-D’s elbows stuck against my leg, one arm under his throat and the other over. I’ve got this pig in a wrestling move. Boy he really doesn’t appreciate the local anesthetic being applied. He is screaming, I can hear the kids crying from the other room, R-D’s thrashing as much as he can against us. It was a real work out. So the vet pushes his anus in and stitches his butthole closed. We are told to give him a suppository for a few days and to use mineral oil in his food so his stool is incredibly soft.

I help Husband load the kids up and off they go to work and Daycare. I remain to take R-D back home. When we got home I thought I was going to need help from our neighbor to get him out. However, as I’m preparing his seclusion center I see him alert and sniffing. I think he knows where he is. So I open the door to the cage and he slowly walks out onto the tailgate of the truck. I pick him up, he screams, BLT screams, everyone screams. I put him in seclusion and watch him as he gulps down his body weight in warm water. BLT is still screaming. He hasn’t figured out where R-D is yet, he just heard him yelling. When I left R-D was wearily laying down under the heat light I provided him. It was a hard day for him.

My day hadn’t even started yet. I shower and dress and go to work for a few hours before going home to check that everything is alright. R-D broke out of seclusion, figures. R-D hopefully will not have a relapse. If he does we were informed we’d just have to eat him. Life is tough when you’re a pig.

Interestingly this episode appears to have made R-D more friendly. I had no problem touching him and getting close to inspect him. I was sure this episode would make him terrified of us. Apparently touching his anus just brought us closer. HA!

R-D

Rocker-Digger (R-D)

BLT

B.L.T.

Establishing new pecking order

While I was taking pictures these chickens were fighting over sleeping position.

Angry peas

Meanwhile the peacocks were glaring at me from above.

I quit my day job

I have worked full time for an amazing couple for the last six and a half years. I love my job. It’s varied and interesting. I’m the only employee so I have an amazing amount of freedom to do whichever task I would like to do at a given time. This job has enabled me to buy hundreds of trees and bushes. This job has been something I’ve truly loved.

So, why am I leaving? Our kids. They have been happy in their childcare center and I have been happy with it as well. That is no longer the case. I do not want to move them to a different center. Our oldest will be in kindergarten next year and he does not take to change well. When we weighed our options it became clear that the best thing to do was stay home with our children.

However, I see it more as the eventual career shift we knew I’d be making happening just a bit faster than planned. We always knew that when the farm was stable I’d quit to farm full time. We aren’t there yet. We only have 5 acres planted, so many more to go. My time has been quite stretched though. There were times this spring when I wasn’t sure I could do everything I was doing. I am relieved to know that I will not have to split time between the farm and my day job any longer. I’m also relieved to have before and after school care figured out for our Son.

I’m not all that sure how I will do things yet. Daughter doesn’t much like being outside. I’m not sure where she gets that from. So I’m not sure how I’ll manage all my chores with her. I’m excited to figure it out though. I’m excited to start a new chapter of our life. I’m excited to be able to devote my time and attention to our trees and plants.

Falling in mud blues

She fell in some mud at the barn and was SOOOOO mad!

Things will be slower now. I’ll be growing more from seed. I’ll be grafting from the trees I have established already. I’ll be more restricted with financial resources. I’ll be so freed up on my time though, I think it will even out. I can finally dig that pond we need for irrigation and the pond we want for swimming. I can build more Kraters. I can build a giant hugelkulture to block wind where it’s needed. I can do so many things now.

So this winter I’ll be focusing on the house. It has been sadly neglected and I fear I am going to be purging vast amounts of useless stuff. I’ll be turning our unfinished basement into a winter play area for the kids. I’ll be finishing the kitchen (I hope). I’ll be very busy this winter.

So stay tuned for interesting things to begin happening on the farm!

Also, pig pets!

Pig rubs Petting the pig

Mini-Krater gardens first snow.

Harvesting Snow in a Krater Garden

I’ve been intensely interested in how much snow our Kraters may collect. They’ve done pretty well with rainwater collection and I assumed they’d fill with blowing snow, but wasn’t sure. The results are in after our first snow.

IMG_3112

Deepest Krater with pawpaw island. Had about a foot of snow all around.

IMG_3113

Largest Krater in circumference. Snow only collected on one side.

IMG_3114

Goji Krater, did the absolute best. For some reason this Krater is just in an ideal location. It always collects the most water, the plants here did the best and it collected the most snow. I’ll have to think and observe why this krater has done so well.

Just for fun here are a few more pics of our first snow collection and fun:

IMG_3110

This is our newly renovated driveway drainage ditch. Filled about 3 feet with snow.

IMG_3117

This is another driveway drainage earthwork and the path from the garage to the ditch filled pretty well with snow. Enough for the kids to enjoy fully!

IMG_3118

As you can see from this pic the snow blows and sometimes we will have 0 snow on large amounts of the property as there is nothing to catch and keep it. We experimented with our earthworks, which work well, and also selective mowing of our incredible sweet clover sections. Selective, on contour mowing harvested a ton of snow. It was far from the house, and the kids were happy where they were, so I didn’t get pics of this. I’ll try to later on.

IMG_3122 IMG_3120

My kids are so adorable!

IMG_3135

I convinced them to go to the barn to feed the pigs and they did this while I was busy doing chores.

IMG_3130

Our akbash is such a weirdo. He doesn’t know what to do with the pigs. He just stood there wagging his tail and doing this high pitched whine that the pigs didn’t like at all.

IMG_3132

Such cute little piggies! Getting friendlier every day.

IMG_3136

Meanwhile, thanksgiving dinner keeps threatening me.

How to grow and use lemongrass with a recipe

Growing and Using Lemongrass

Lemongrass is such a wonderful plant. It can be used in cooking, to deter bugs, to make tea and medicinally. WebMD even has a page on it:

  • Lemongrass is a plant. The leaves and the oil are used to make medicine.
  • Lemongrass is used for treating digestive tract spasms, stomachache, high blood pressure, convulsions, pain, vomiting, cough, achy joints (rheumatism), fever, the common cold, and exhaustion. It is also used to kill germs and as a mild astringent.
  • Some people apply lemongrass and its essential oil directly to the skin for headache, stomachache, abdominal pain, and muscle pain.
  • By inhalation, the essential oil of lemongrass is used as aromatherapy for muscle pain.
  • In food and beverages, lemongrass is used as a flavoring. For example, lemongrass leaves are commonly used as “lemon” flavoring in herbal teas.
  • In manufacturing, lemongrass is used as a fragrance in soaps and cosmetics. Lemongrass is also used in making vitamin A and natural citral.

How does it work?

Lemongrass might help prevent the growth of some bacteria and yeast. Lemongrass also contains substances that are thought to relieve pain, reduce fever, stimulate the uterus and menstrual flow, and have antioxidant properties.

Source

I wanted to grow lemongrass for a different reason, the oil attracts bees. As you know we built our own beehives. I do not want to buy a package of bees, I’d rather attract a swarm. To do that I needed lemongrass essential oil. Husband has been wanting to try his hand at making essential oil, so I just needed the lemongrass. I went to our local oriental market and bought all the lemongrass they had. I put them in a jar of water until they’d sprouted roots, then I planted them out to the kitchen herb garden. They have really taken off. I’ve harvested some for lemongrass chicken and loved it.

lemongrass

Lemongrass

thai basil

Thai Basil

Here is Daughter helping me prep the lemongrass. Ok, she’s just chewing on it. She informed me she didn’t like eating grass.

  a-real-help

Such a cute face!

IMG_2997

Stripped of stalk.

IMG_2996

All I did to prep the lemongrass was strip off the base leaves, cut the white base of the stalk off, wash it and chop it up to be added to dinner. The recipe I gathered inspiration from is this one. As usual, I didn’t follow the directions and modified as I saw fit. I used bean noodles, sliced chicken breasts, carrots, and green onions. I did not use fish sauce, cuz yuck!  O let me just tell you my recipe:

Lemongrass Chicken with Bean Noodles

Ingredients

  • 1 serving bean noodles
  • Olive Oil- enough to coat bottom of pan
  • 2 large lemongrass stalks or 5 small ones.
  • 1 clove garlic, minced
  • 1 teaspoon dried ginger
  • 10 leaves fresh thai basil
  • 1 carrot sliced thinly
  • 2 Tablespoons lemon juice
  • 1 TB brown sugar

Directions

 Cook bean noodles as directed on the package.

Add lemongrass, ginger, oil and garlic to a medium skillet and sauté until fragrant. Add the sliced chicken and cook through. Add lemon juice, basil and brown sugar and coat chicken. Next add the noodles and warm through. Remove and serve in a bowl with carrot curls and green onions.

Add spice, to taste with sriracha or red pepper flakes. My children do not like spice and so we kept it optional.

I think bean sprouts would be great in this dish but I didn’t have any when I first made it and it was still great.

IMG_3004

Cooking noodles

IMG_2995

Cooking the lemongrass, garlic and ginger.

IMG_3003

Browning the chicken.

Lemongrass chicken with noodles

Delicious!

What really works to control houseplant pests?

Debunking Houseplant Pest Control Myths

That is the question I’ve been mulling as I suffer through pest after pest on my indoor plants. I believe I have spider mites. I know I have aphids, white flies and fungus gnats. Actually, at this point it’s more of a question of what I DO NOT have on my plants. This is so discouraging as my jasmine plant has finally bloomed, and I believe that to be what attracted the aphids. They are fully encompassing my jasmine flowers.

This just won’t do, so I started treating. I happened to have a 3-in-one organic pest spray on hand from previous years. So naturally I used that first. It knocked some of the bugs off but it didn’t kill a single one.

Organic Spray

Organic Spray is seen here, dripping off my plant. The jasmine flowers are completely covered in bugs

Next I went out to the chicken run and grabbed some Diatomaceous Earth (DE). If you’ve heard of DE before than you know that people proclaim DE to cure absolutely any pest infestation. This dirt has received so many amazing accolades in the organic/homesteading/permaculture community that I had visions of the bugs flopping over dead on contact. So what actually happened? Well I covered my plants in dust is all. It didn’t have any impact on the pests. Well, I shouldn’t say that exactly. The impact it had on pests is that they’ve moved from on top of the leaf, where the dust is, to under the leaf, where it is not.

DE covered plants

Next up is the old rubbing alcohol, soap, water wash. This I figured had to work as you are physically removing the bugs. It does work, you do remove them. However it is incredibly time consuming and you have to continue doing it.

Cleaning off the DE

I’m brushing the DE off my plants here.

IMG_3034

Wiping the bugs off.

Neem oil is supposed to repel the creepy crawlies so I set about locating and acquiring that next. It has been applied to my jasmine plant and I will let you know if there is any real impact on the pests in my home as this was done very recently and I have nothing to report yet.

Neem oil

Ok. I admit. This was for photo purposes only. I put the Neem oil in water and sprayed in on the plants.

Sevin dust is a last ditch effort for me. I’m not even sure it will work as I used it on my peppercorn plant last winter and it almost killed the plant. If Neem oil and Sevin dust fail me I’ll simply have to throw my plants out to get rid of the nasty bugs. I’d really rather not kill my plants.